Custom App
This page guides you through creating custom apps, editing code, and modifying the main page quickly. The below table outlines the four available auth types of Custom Apps.
| Auth Type | Detail | Function | Data source | Code | Data Access |
|---|---|---|---|---|---|
| 1. Shared Pass | Shared Pass Code | auth-form,main-page,table,form,log | specific databox | editable | Controllable per group |
| 2. User Key | Use unique Base64-encoded keys for each user | auth-form,main-page,table,form,log | specific databox | editable | Controllable per user |
| 3. Other | Any | auth-form,main-page,table,form,log | specific databox | editable | Customize everything |
| 4. No auth | No Authentication | main-page,table,show-record(ro) | specific databox | editable | Read only, it can be used as static site |
Required
Please setup Base App beforehand refering to Quick Start.
Common Setup Steps
Each type of custom app has a common set of steps, the main difference lies in the authentication method.
- Generate Databox for datastore
- Generate Custom App
- Update main page with Markdown or HTML tag
- Add user
- Update bin/scripts #optional
- Add subApp #optional
Following is example of generating custom App.
Generate Databox
Please generate databox that will be used for Custom App first.
sudo /usr/local/small-shell/adm/gen -databox
# -> dialog will be started
Generate App
Once databox is ready let's generate custom App. In this example App name is test and it will use base64 key for authentication. Note that you can use any name you prefer for the App Name.
sudo /usr/local/small-shell/adm/gen -app
Type of App (1.BASE | 2.FORM | 3.CUSTOM): 3
App Name: test
Type of Authentication (1.shared pass | 2.user key | 3.other | 4.none):  2
Primary databox: item.db
Note
If you want to use Custom App as static site, please input "none" to primary databox, see details on cookbook.
Update main page
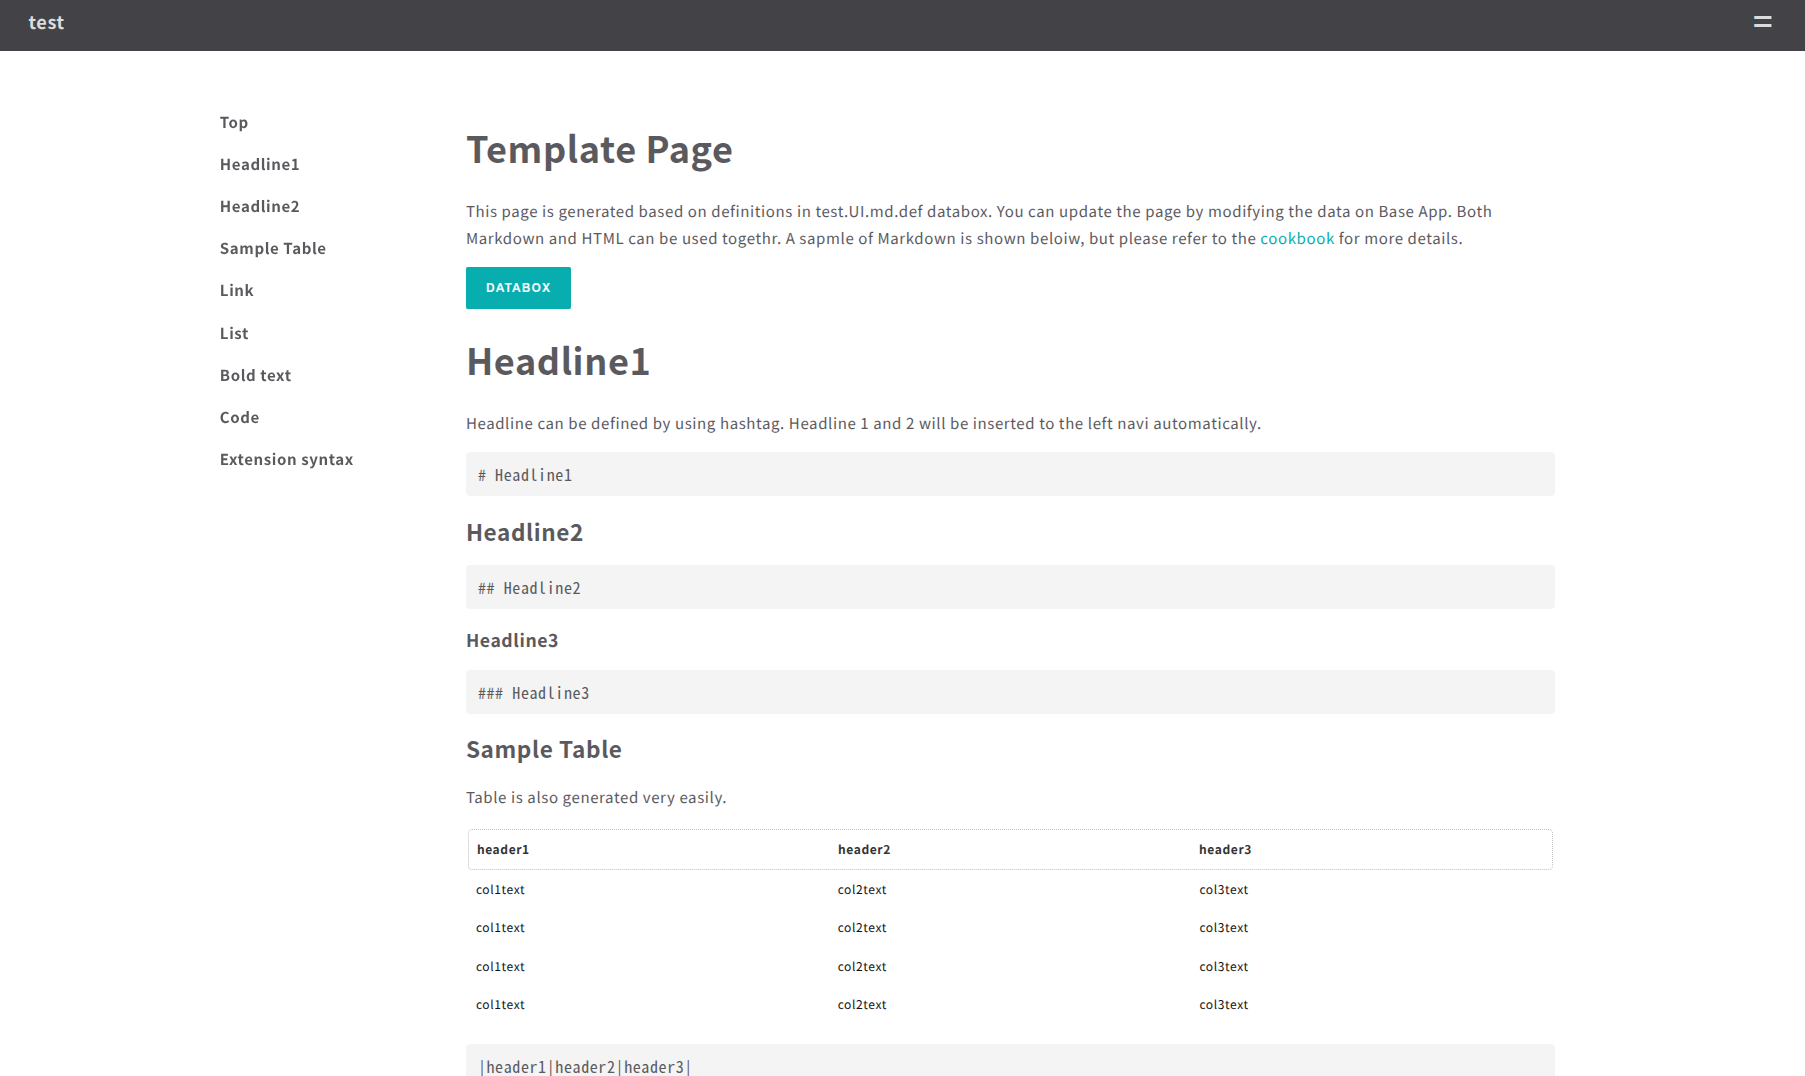
You can update your application main page on Base App or edit code directly, please check detail on Cook book. Default main page image is here.
Add user to the App
If you select Key App, please add user for the App. Then you can get URL that can generate key for the end user.
sudo /usr/local/small-shell/adm/ops app:$your_app_name add.usr:$user_name

e.g.) add "test_user" user for key App name "test"
sudo /usr/local/small-shell/adm/ops app:test add.usr:test_user
-------------------------------------------------------------------------------
This is the URL for key initialization and generation for test on Base App
-------------------------------------------------------------------------------
https://${your_server_FQDN}/cgi-bin/auth.test?initialize=cd5e7330e5fb92b4999f2a7801da7267c802c4109a7126be47d5049cd7d5c440,6bc0917d9510ae794ab5cb5d1e65834c09ad11fbd3d78db881a656c591d1604a
Connect to the App
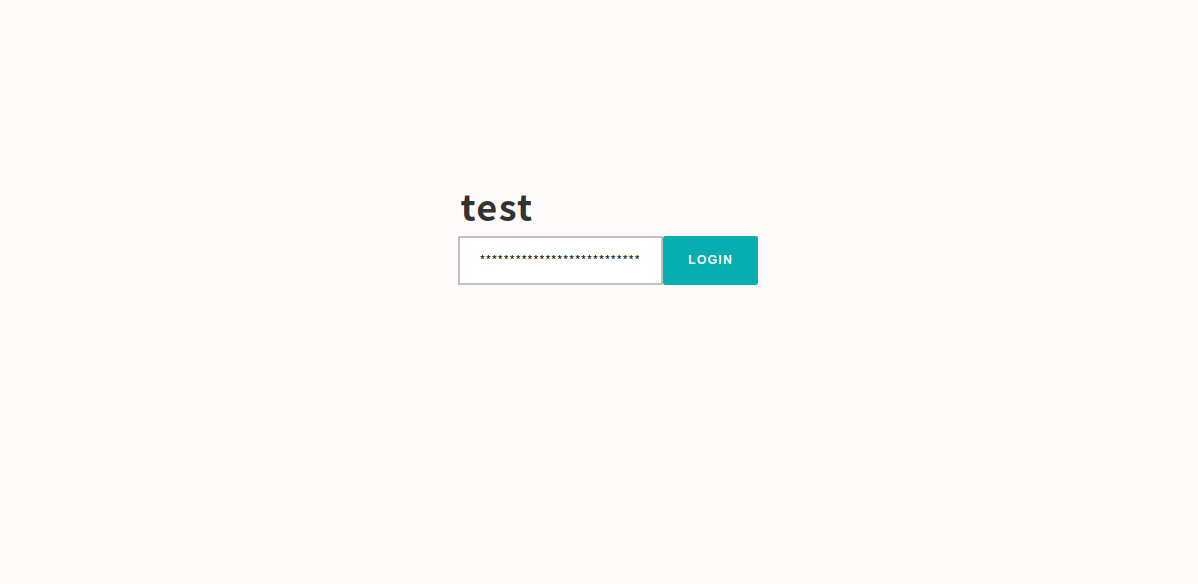
End user key that's generated above command will be stored to end user browser automatically using localstorage by javascript once connected to above url.
Access URL of the App
If you are using default Web server, your application URL must be ${your_server_FQDN}/${your_app_name} except "other" type App. URL will be shown in the dialog of gen command.
e.g.) App:test, URL:https://${your_server_FQDN}/test
Re-generate User key
If end user lost their key, you can generate URL for re-generating key.
sudo /usr/local/small-shell/adm/ops initialize.usr:test app:test
Update Pass code
If it's Shared Pass code App, you can update pass code by updating file directly
sudo vi /usr/local/small-shell/web/${your_app_name}.code
Update codes (optional)
Then App will be generated to directory that you already defined in Base App dialog. you can update codes freely. As for small-shell framework please check MVC model
Target codes
# actionscripts
$bin (/var/www/bin)

# HTML defs
$def(/var/www/def)
Parameter change of bin/scripts
In this example, accesible key of databox is changed. In the default permission, end user can access all keys of databox from the Custom App.
e.g) restrict data keys
sudo vi /var/www/bin/test_get.sh

--code--
# Target databox and keys
#keys=all
keys=item_name,description
--------
HTML def
You can edit HTML directly.
sudo vi /var/www/def/test_main.html.def
sudo vi /var/www/def/test_table.html.def
Use member list
If you want to import user list on your App's form. please select "mls" as data type in the gen dialog of data box creation. mls can import user list of your Custom App. Following is an example.
Col2 Key Name: assignee
Col2 Key Label: Assignee
Data Type (text | select | radio | checkbox | email | num | tel | date | date-time | url | textarea | file): mls
Tagging on Custom App
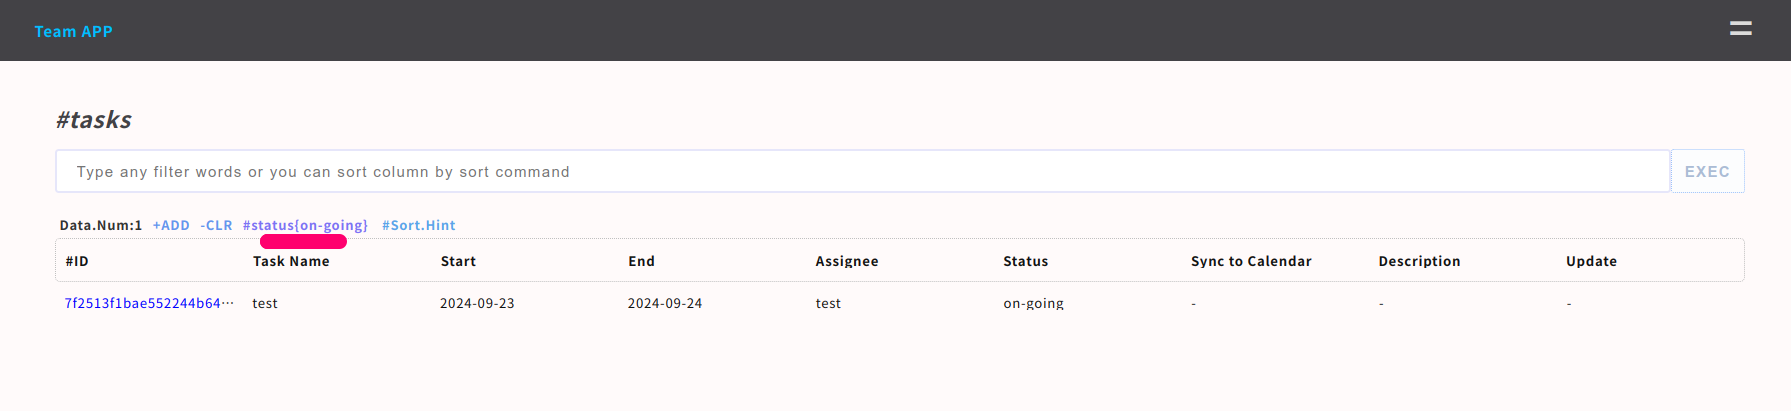
You can add search tag to the table by ops command
sudo /usr/local/small-shell/adm/ops add.tag:$databox{key{word}} app:$your_app_name

e.g.)
sudo /usr/local/small-shell/adm/ops add.tag:tasks{status{on-going}} app:tasks
Change user permission
User permission can be changed by ops command.
# change to read only
sudo /usr/local/small-shell/adm/ops set.attr:$user_name{ro} app:$your_app_name

# change to read / write
sudo /usr/local/small-shell/adm/ops set.attr:$user_name{rw} app:$your_app_name
You can add any extension information to user attribute. Following is an example to set attribute to ken as admin for management App.
# user=ken app=management
sudo /usr/local/small-shell/adm/ops set.attr:ken{admin=yes} app:management

# confirm permission
sudo -u small-shell /usr/local/small-shell/bin/meta get.attr:management/ken{admin}
>yes
update def
If you delete or put of actionlink, please update get.html.def directly
# e.g ) add delete function to test App
# sudo vi /var/www/def/sapp_get.html.def
sudo vi /var/www/def/test_get.html.def
--code--
       <div class="action_links">
        <span><p style="cursor: pointer" onclick="window.open('./test?%%params&req=log_viewer&id=%%id', 'log_viewer', 'width=820,height=280')">Show data update history</p></span>
        <span><p style="cursor: pointer" onclick="del_confirmation()">Delete</p></span>
--------
Add databox to the app
Basically Custom App connect to only 1 databox. "Sub App" is the way to add databox to your Custom App additionally. Here is an example to add databox "inventory.db" to Custom App "test".
sudo /usr/local/small-shell/adm/gen -app
Type of App (1.BASE | 2.FORM | 3.CUSTOM): 3
App Name: inventory@test
Subapp databox: inventory.db
Once sub app deployed, please check routing and menu that will be updaated automatically. You can freely modify them.
# routing
# sudo cat /var/www/cgi-bin/${parent_app}
sudo cat /var/www/cgi-bin/test
# menu
# cat /var/www/def/common_parts/${parent_app_common_menu}
cat /var/www/def/common_parts/test_common_menu
Portal page link will be updated as well. Please check on Base App.
Meta link
You can generate links that can be used in the App.
sudo -u small-shell /usr/local/small-shell/bin/meta get.link:$your_app_name
for subapp
sudo -u small-shell /usr/local/small-shell/bin/meta get.link:$subapp@$parent_app_name
Import App from template
Creating App template is sub project of small-shell. You can import App template from GitHub.
Team App
This App template could manage not only Team events, but also tasks, shared drive, bookmarks and inquiries.
Team App funcions
| Function | type | Description |
|---|---|---|
| Calendar | main | Manage team events in main page |
| Announcements | sub-app | Share announcement to the team |
| Tasks | sub-app | Manage team tasks {assignment,status,deadline,sync_calendar} |
| Inquiries | sub-app | Manage inquiryes from external users |
| Drive | sub-app | Provide storage that have optional link to share file to external users |
| Bookmarks | sub-app | Manage bookmarks |
| Inquiry | form | Inquiry Form to the Team |
Link to code is here
cd /var/tmp
git clone https://github.com/naruoken/small-shell-apps
cd small-shell-apps/team_app

# Deploy Team App
sudo ./deploy.sh
Add user to Team App
Please add user to the App, then you can get key to access team main.
sudo /usr/local/small-shell/adm/ops app:team add.usr:test
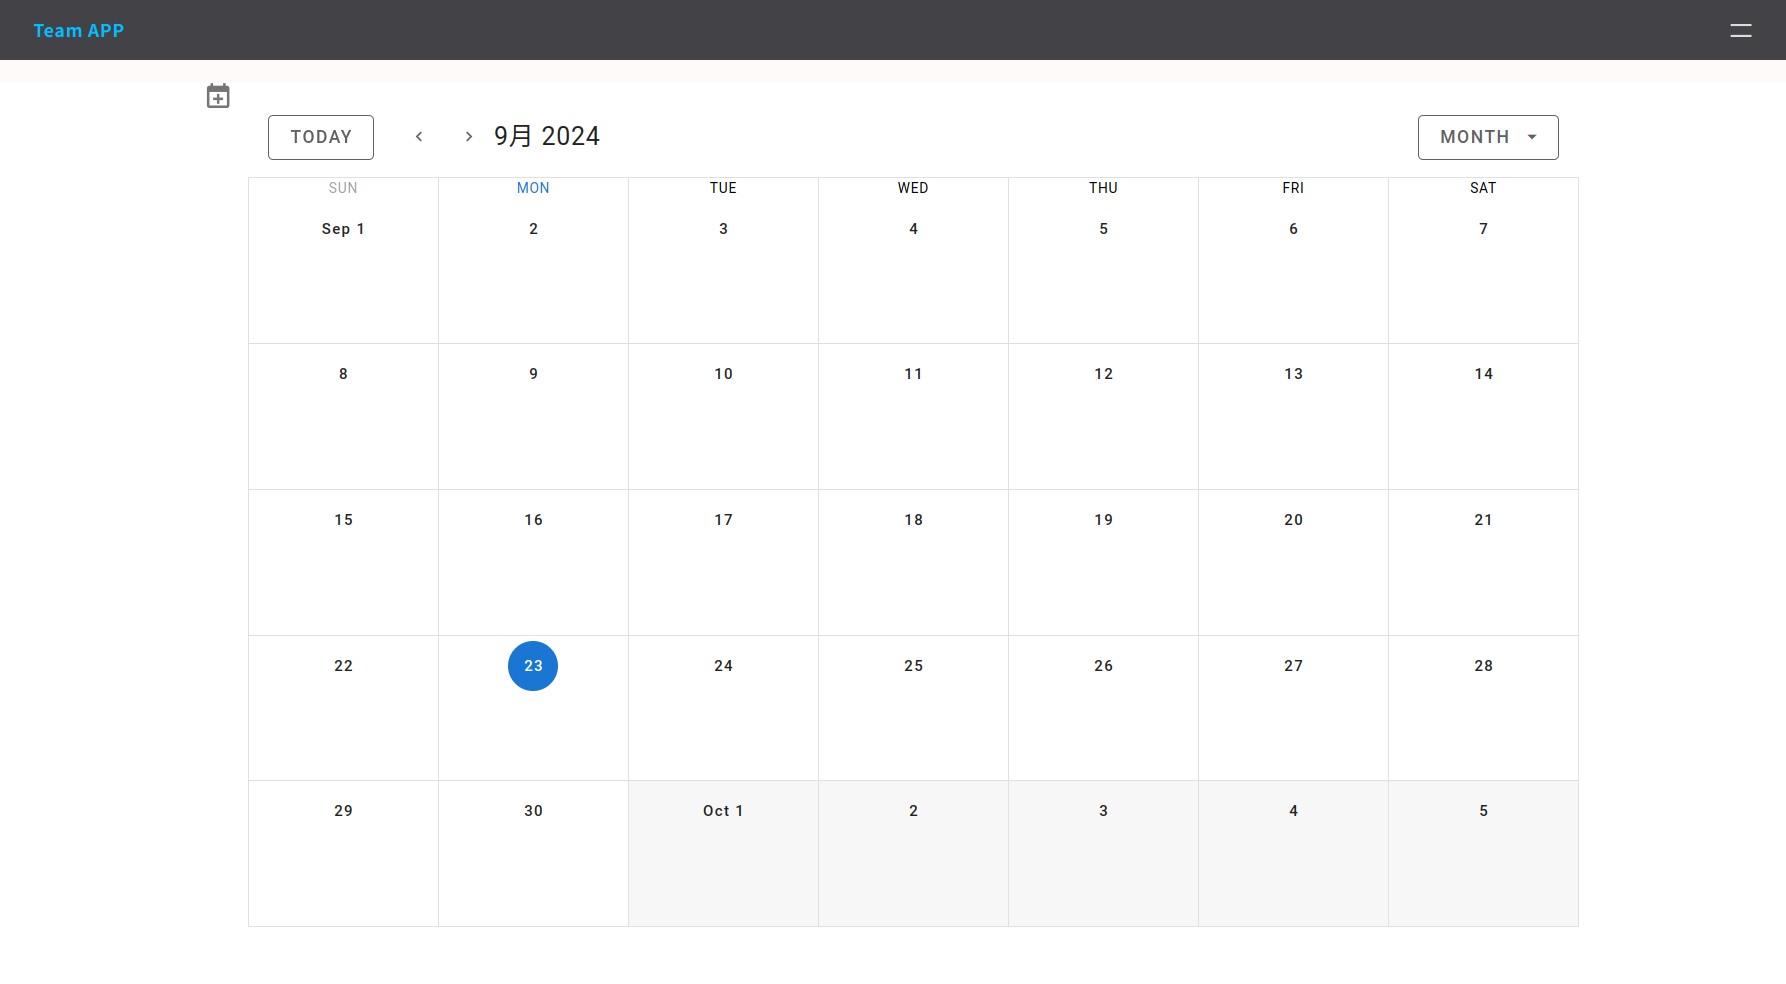
Access URL of Team App
There is 2 URL for using Team App, 1 is for App user, 1 is external user for inquiry. please try to use.
# Team App
https://${FQDN}/team

# Inquiry Form
https://${FQDN}/inquiry
Oauth integration
If you want to use Oauth, it's recommended to select other type App.
sudo /usr/local/small-shell/adm/gen -app
Type of App (1.BASE | 2.FORM | 3.CUSTOM): 3
app_name: oauth_test
Type of Authentication (1.shared pass | 2.user key | 3.other | 4.none): 3
We made sample script that can be integrated with Oauth provider, please get each parameter from Oauth provider beforehand.
# input small-shell app name
app="oauth_test"
echo $app

cd /var/tmp
git clone https://github.com/naruoken/small-shell-apps

# select provider
provider="gcp"

cd small-shell-apps/oauth_sample/authorization_code

# UPDATE PARAMA
vi ./cgi-bin/${provider}_auth
#------------------------------------------------
# target params
exchange_token_uri=""
user_info_req_uri=""
redirect_uri=""
client_id=""
client_secret=""
target_claim=""
#-------------------------------------------------

# sample input
#------------------------------------------------
#exchange_token_uri="https://oauth2.googleapis.com/token"
#user_info_req_uri="https://www.googleapis.com/oauth2/v1/userinfo?"
#redirect_uri="http://XXX/cgi-bin/auth.oauth_test"
#client_id="XXX.apps.googleusercontent.com"
#client_secret="XXXX"
#target_claim="email"

vi ./def/${provider}_oauth_form.html.def
#------------------------------------------------
# target params
  var CLIENT_ID = '';
  var REDIRECT_URI = '';
  var OAUTH_END_POINT = '';
  var SCOPE = '';
  var STATE = '';
#-------------------------------------------------

# sample input
#------------------------------------------------
#  var CLIENT_ID = 'XXXX.apps.googleusercontent.com';
#  var REDIRECT_URI = 'http://XXXX/cgi-bin/auth.oauth_test';
#  var OAUTH_END_POINT = 'https://accounts.google.com/o/oauth2/v2/auth';
#  var SCOPE = 'https://www.googleapis.com/auth/userinfo.email';
#  var STATE = 'statee';
#------------------------------------------------

# DEPLOY
authkey=$(grep authkey= /var/www/cgi-bin/auth.$app | sed "s/authkey=\"//g" | sed "s/\"//g")
echo $authkey
cat ./cgi-bin/${provider}_auth | sed "s/%%authkey/${authkey}/g" | sed "s/%%app/${app}/g" > .auth.$app
sudo cp .auth.$app /var/www/cgi-bin/auth.$app
. /usr/local/small-shell/web/base
cat ./def/${provider}_oauth_form.html.def | sed "s#%%static_url/#$static_url#g" | sed "s/%%app/${app}/g" > .${app}_auth_form.html.def
sudo cp .${app}_auth_form.html.def /var/www/def/${app}_auth_form.html.def
sudo chmod 755 /var/www/cgi-bin/auth.$app
Then you can try to connect App through Oauth.
https://${fqdn}/cgi-bin/auth.oauth_test
Delete Custom App
You can delete your custom App by using util script as following.
usage: sudo /usr/local/small-shell/util/scripts/del_app.sh $app
Technical Tips
There are technical Tips. please check them.
1. Get ID & key's value
You can get text name using ID and key using "none" format
@bin/script (shell)
 # get name which will be issued
 DATA_SHELL="sudo -u small-shell ${small_shell_path}/bin/DATA_shell session:$session pin:$pin"
 book_name=$($DATA_SHELL databox:book.master action:get key:name id:$id format:none | $AWK -F ":" '{print $2}')
2. ID search by using Name
You can also get ID using 100% matched text
@bin/script (shell)
 # get book ID Based on the name
 DATA_SHELL="sudo -u small-shell ${small_shell_path}/bin/DATA_shell session:$session pin:$pin"
 book_id=$($DATA_SHELL databox:book.master command:show_all[match=name{$book_name}] format:json | jq '.[] | .id'| $SED -s "s/\"//g")
3. Json insert to javascript instance
In terms of integration with javascript frameworks, we would like to recommend to insert bulk of json datas to javascript directly using %% tag because ajax with small-shell will take 1 or 2 sec for getting data.
Json technique (javascript in html def)
events: [
  // %%events
],
generator in bin/${app}_main.sh
# app parameter will be your app name
sudo vi /var/www/bin/${app}_main.sh

--code--
# -----------------
# generate json
# -----------------

$DATA_SHELL databox:${app}.events command:show_all format:json \
| $SED "s/{%%%%%%%%%%%%%%%%%}/'/g"\
| $SED "s/{%%%%%%%%%%%%%%%%}/%/g"\
| $SED "s/{%%%%%%%%%%%%%%%}/*/g"\
| $SED "s/{%%%%%%%%%%%%%%}/$/g"\
| $SED "s/{%%%%%%%%%%%%%}/\#/g"\
| $SED "s/{%%%%%%%%%%%%}/|/g"\
| $SED "s/{%%%%%%%%%%%}/\]/g"\
| $SED "s/{%%%%%%%%%%}/\[/g"\
| $SED "s/{%%%%%%%%%}/)/g"\
| $SED "s/{%%%%%%%%}/(/g"\
| $SED "s/{%%%%%%%}/_/g"\
| $SED "s/{%%%%%%}/,/g"\
| $SED "s/{%%%%%}/\//g"\
| $SED "s/{%%%%}/\&/g"\
| $SED "s/{%%%}/:/g" > /var/www/tmp/${session}/events

# -----------------
# render HTML
# -----------------

cat /var/www/def/gentest_main.html.def | $SED -r "s/^( *)</</1" \
| $SED "/%%common_menu/r /var/www/def/common_parts/gentest_common_menu" \
| $SED "s/%%common_menu//g"\
| $SED "/%%events/r /var/www/tmp/${session}/events" \
| $SED "/%%event_add_btn/r /var/www/tmp/${session}/event_add_btn" \
| $SED "s/%%event_add_btn//g"\
| $SED "s/%%user/${user_name}/g" \
| $SED "s/%%session/session=${session}\&pin=${pin}/g" \
| $SED "s/%%params/session=${session}\&pin=${pin}/g"

--------
4. Disable main page
If your App will not use main page, please change main request to table by adding these codes.
sudo vi /var/www/cgi-bin/${app}
--code--
if [ "$req" = "main" ];then
  req=table
fi
--------